The Trim Command
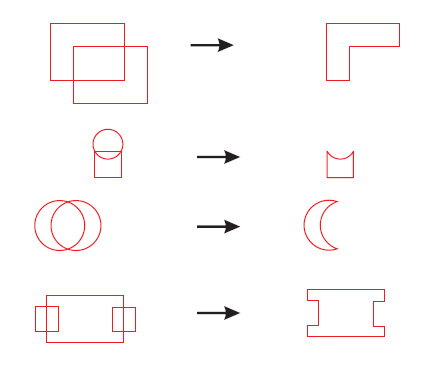
The Trim command creates a single curve from 2 or more components. The components must overlap. Trim forms the shape of the selected object (Source Object) into the object you trim to where it overlaps.
(Target Object).
You are given the option to leave the original Source object and/or Target object. Checking these tick-boxes will create duplicate originals. This is useful for advanced users with good planning skills and enables better productivity. It is advised that you leave these tick-boxes unchecked until you are fluent with using the Shaping tools. The Source Object is the object you originally select to weld or trim. The Target Object is the object you subsequently act upon. It is important to understand that using these tools will affect the properties of the objects you are working with. The source object will take on the properties of the target object. The best way to understand how these tools are used is by example.
Draw a rectangle. Now draw a second rectangle that overlaps the first. With the second rectangle selected, click trim and with the arrow cursor that appears click on the first rectangle.

